20 Dec 2023
Probably my last post of the year, but I thought since Cloudflare’s tunneling capabilities are getting a lot of press recently that people might find this useful. Getting some experience in C2 infrastructure was one of my goals for 2023 and having set up a working Apache redirector on Azure and now seeing how simple Cloudflare tunneling is, I think this may be the way forward, especially since they are free!
Essentially what they allow you to do is to specify a link on your own domain, that they will then pass through Cloudflare’s tunnel over https into your own private infrastructure. On your end, and within your own system, you must first start the tunnel on Kali to make the link with Cloudflare.
This is probably best described over a few basic steps.
Setup
First of all to use your own domain name in this process you need to go to the domain name’s DNS settings and to redirect them to Cloudflare’s own DNS serevers. When you sign up to Cloudflare they will provide the DNS servers to allocate but they will be something like nataly.ns.cloudflare.com. They say this could take 24 hours but in reality it only takes a few minutes in my experience.
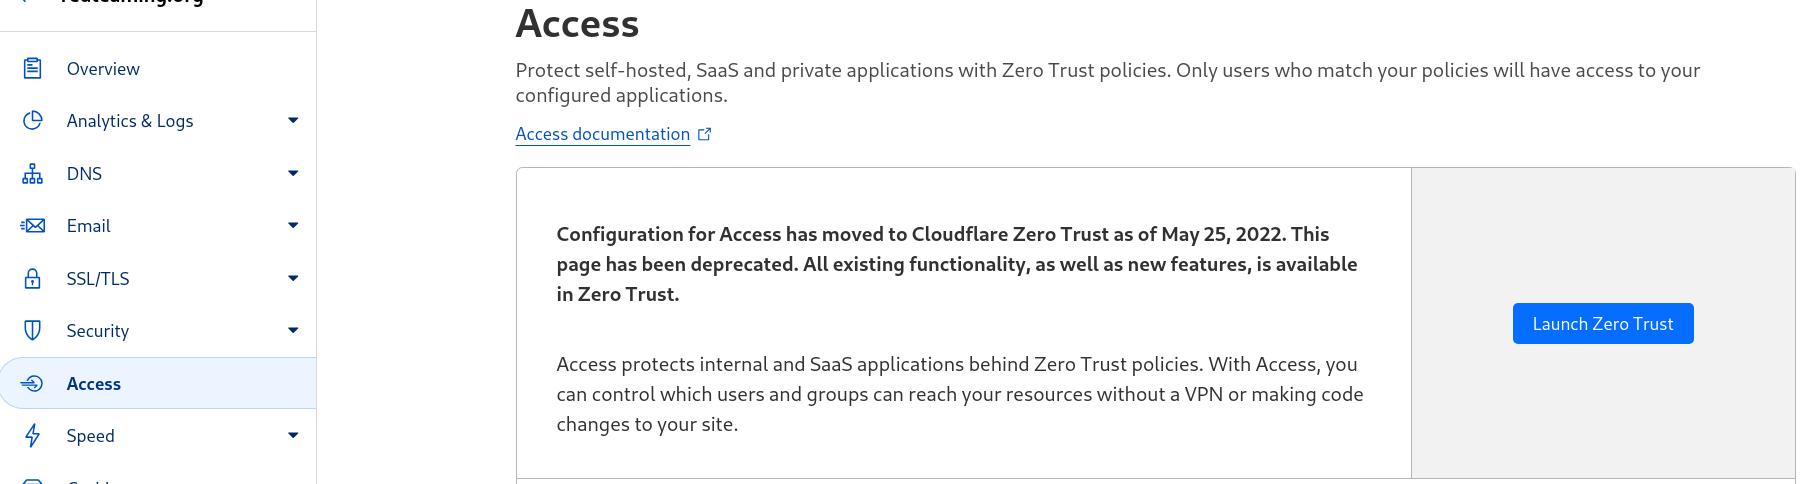
Next up we should create our tunnel. We go into the Cloudflare dashboard choose our site, then choose Access. This will have a ‘Launch Zero Trust’ button which you can click as shown:
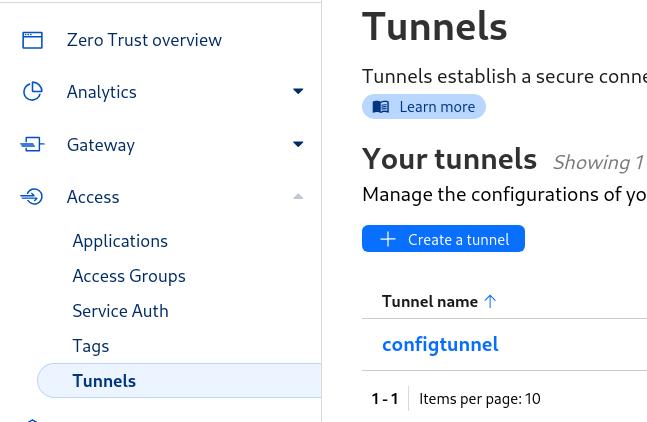
Then choose ‘Access’ followed by ‘Tunnels’. This will display the ‘Create a tunnel’ button as shown and you can see mine is named ‘configtunnel’:
You will now be provided the code, including the ‘YourVeryLongSecretKeyHere’ referenced below, that you need to run to connect your private internal infrastructure to Cloudflare as shown:
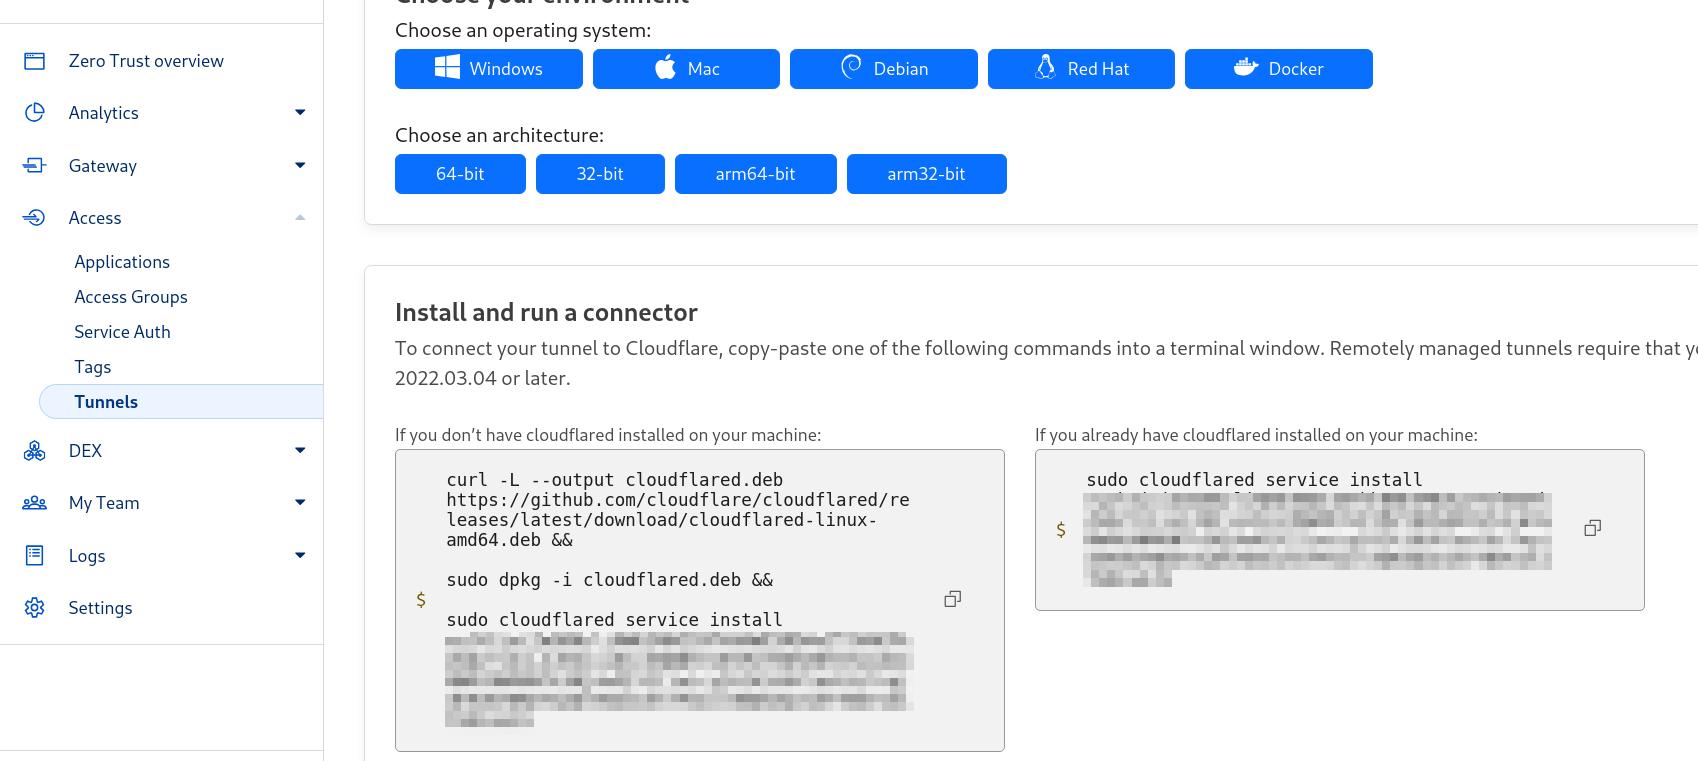
I chose Debian then 64-bit and the code I received was similar to below which I then ran on Kali:
curl -L --output cloudflared.deb
https://github.com/cloudflare
/cloudflared/releases
/latest/download/cloudflared-linux-amd64.deb

sudo dpkg -i cloudflared.deb

sudo cloudflared service install YourVeryLongSecretKeyHere
You then run the tunnel as shown:
cloudflared tunnel run --token YourVeryLongSecretKeyHereYour tunnel should now be connected to Cloudflare.
Tunnel Subdomains
There is likely lots of ways (with less obvious naming etc) to set up your routes that can access the tunnel but the way I built mine for testing was to set up 2 routes as shown:
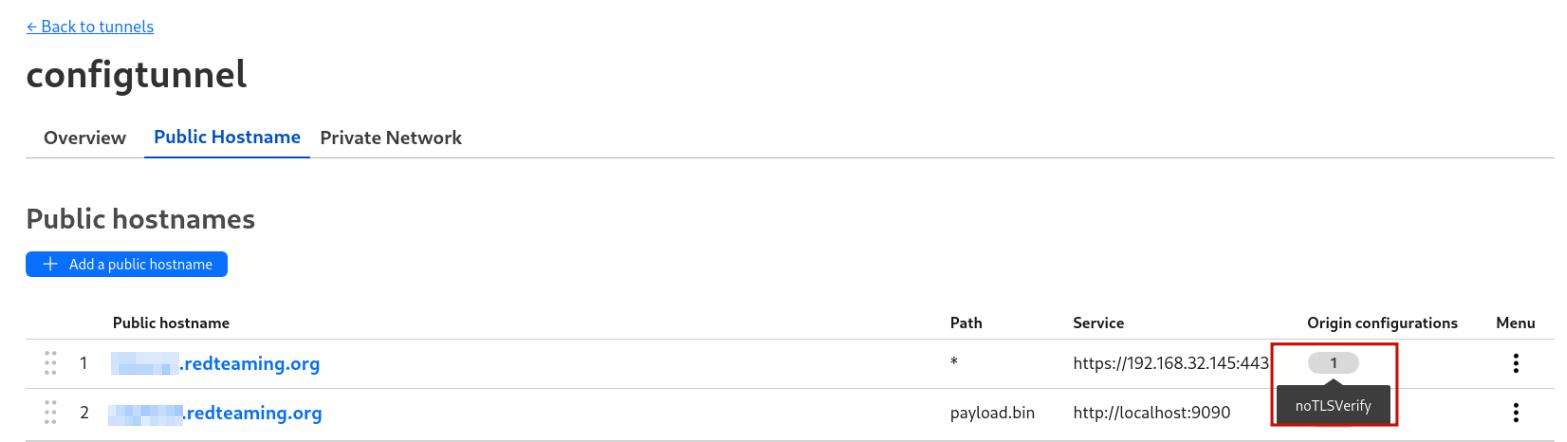
I created https://subdomain1.redteaming.org and http://subdomain2.redteaming.org/payload.bin. For subdomain1 I will route any traffic that hits https://subdomain1.redteaming.org and route it via the connected tunnel to the internal IP VMware gives me on Kali which is 192.168.32.145. On port 443 of that IP I then have my Havoc listener accepting connections. Therefore when creating a payload I set the payload to call back to https://subdomain1.redteaming.org which then gets routed back to my internal Havoc server.
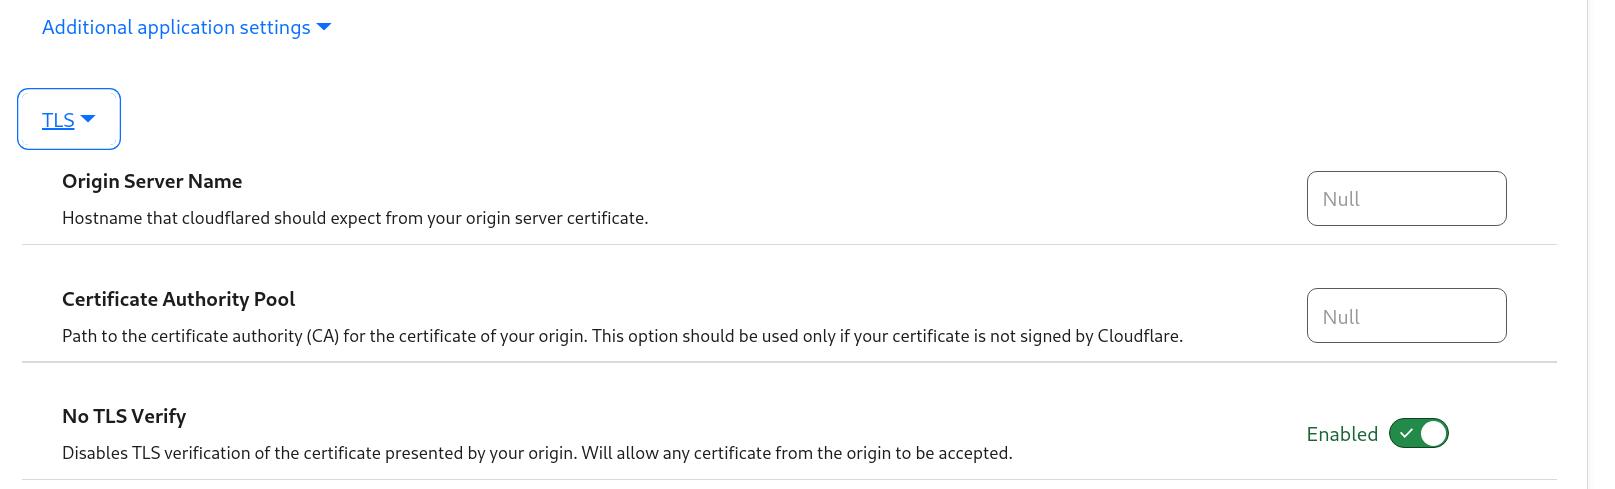
The only other change to get this working was to go into the ‘Additional application settings of that route and to enable the ‘No TLS Verify’ flag as shown to avoid TLS checks:
For subdomain2 I will route any traffic that hits the http://subdomain2.redteaming.org/payload.bin url which will be routed back to my infrastructure and will grab a payload.bin file from my internal webserver. This is just another use case I thought might be useful.
Two things to keep in mind, is that as soon as you stop the tunnel on Kali, all these routes are down, so it isn’t something that is up and running constantly that you have to worry about.
Second thing is, that you can also set up the tunnels without moving your DNS to Cloudflare. To do this when you start the tunnel on Kali run it with this command:
cloudflared tunnel --url http://localhost:8080The ‘cloudflared’ command will then spit out a temporary url that you can also use to access the tunnel, which can be handy if you don’t own a domain name and want to test the tunnels out.
I hope this whistle stop tour is useful for people out there and if you are more a video type of person, I found this handy from ‘Network Chuck’ when I was working all of this out.
Happy Christmas and Happy New Year! Roll on 2024 for lots more Hacking.